
I have just published my first book on Blurb. It’s been a project for a while now, but the past week or so, I finally put the finishing touches together. It’s basically an account of my experiences with nature, both at home in the UK and in Nepal back in 1994. As an added touch, I have also included a number of photographs.
Showing posts with label photography. Show all posts
Showing posts with label photography. Show all posts
Thursday, 10 February 2011
Tuesday, 4 January 2011
Guide to Winter Photography
 |
| Slight underexposure, giving cold feel. |
 |
| The effects of sunlight in a scene. |
 Some of us don’t get the chance for winter photography as often as we would like, so it is important to take the opportunities when they arise, to avoid the frustration of taking an amazing photo, only to get home and find it is dull and grey and not how you imagined at all. The key is to be prepared and to experiment, so that you can react to a scene with experience, rather than hoping for the best. While slight adjustments are possible when shooting in RAW, the more you need to adjust in processing the worse the outcome. Subtle is always best and in my experience, HDR photography doesn’t work well when snow is present. While this guide is for snow and ice, it can also be used for other scenes with alot of bright areas, such as water or other reflective surfaces or white birds or other wildlife. The principles can also be used for dark scenes, reversing the exposure compensation as required. Beyond anything else though, enjoy the chance to photograph the snow and be careful getting to your chosen locale. It may be useful to have chosen locales set up ready for when the cold weather arrives, so that long distance travel isn’t necessary.
Tuesday, 16 November 2010
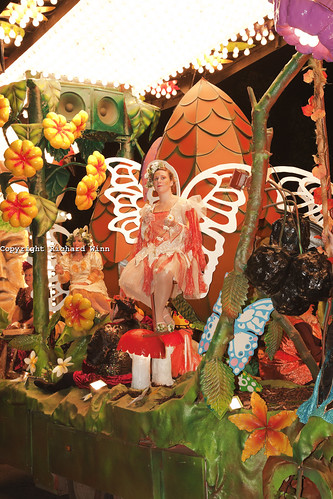
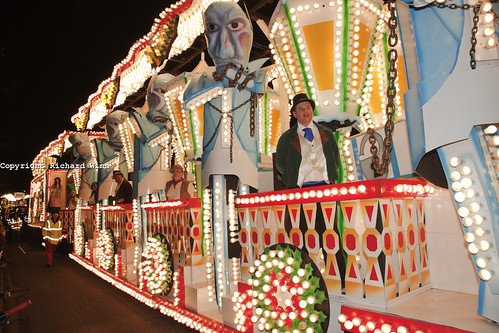
Glastonbury and Chilkwell Carnival
Monday, 11 October 2010
Autumn and Photography
Photography can be a productive time for the nature photographer. Not only do you have the autumn colours to add a dimension to landscapes, but you also have the closeup abstract of autumn colours, not to mention all the fungi that spring up, telling the story of death and rebirth. They are nature's way of recycling the old, ready for the new in Spring. Of course, they come in all shapes and sizes, from the tiny Mycena spp. to the larger polypore fungi seen on tree trunks and at their bases. Many are simply white, brown or grey, but others add their own colour to autumn, with bright reds, pinks and purples, with a few yellows and even blues and greens. The weather may not always be at its best, with many dull grey days, but even these help to enhance the colours. Even on the dullest of days, it should be easy to find something in nature to photograph.
Monday, 27 September 2010
Back from Scotland
 It's been over a week since I got back now, but it's taken some time to process the photos. I recently spent a week in Scotland, on my annual fix of the highlands. I was quite surprised to find that I took over 1500 images. Of course, many of those were duplicates (or near duplicates) and some were "misses", due to photographing fast moving subjects, where timing was involved (such as gannets plunge diving and slamon leaping). The results were very much hit and miss, and with the salmon shots there was a lot of guesswork involved in pre-focussing, unfortunately, my guesswork wasn't working well, with most being out of focus.
On a more positive note, I was able to execute some ideas I'd had for some time, with some selective focus shots of a toadlet and some common lizards. Also, I saw my first newt and white tailed eagle. There was one shot in particular that just came together and is another of my milestone images, mainly because I was able to execute a pre-conceived idea. The image was of a toadlet of the common toad, using selective focus head-on and it has become my first limited edition print, priced at £34.99 for an A3 print.

Wednesday, 26 May 2010
Photographs in Horner Woods
On Sunday, I made a trip to Horner Woods on Exmoor. My target was to photograph dippers and grey wagtails, although I wasn't expecting much, as I thought there would be too many people about. I was also planning to look for signs of otters on the higher reaches of Horner Water.
As it turned out, it didn't go too badly. I don't often photograph still life, particularly flowers, as I don't feel it is a strong point of mine, but I have been thinking more about photographing wildflowers recently. I was able to experiment a bit while I was there on some forget-me-nots and dog violets (the dog violets didn't quite works), as well as some ferns (I went a bit too far with the selective focus). I also struck lucky as well though and spent about half an hour or more observing and photographing a pair of grey wagtails. It was a little dark to be able to keep the shutter speed high enough, even at a high ISO (I wouldn't want to go higher with the 7D, as it is on its usable limit), but I was able to get some atmospheric photos when they were in the filtered sunlight.
Latest Photography Uploads - Images by Richard Winn
Sunday, 14 March 2010
Reality of Photography
In recent months, there has been much debate on about whether or not nature photography should portray reality. It reached a head, following the disqualification of "The Story Book Wolf" from the 2009 Veolia Wildlife Photographer of the Year competition, after many discussions over its authenticity as a "true" wildlife image. The accusation was, that the wolf was a captive wolf, as it closely resembled one such wolf that was for hire. The evidence centred around the resemblance and the likelihood of a wild wolf behaving in the manner portrayed in the photograph. Ultimately, it is only the photographer and perhaps others associated with the photographer, who knows the truth behind the accusations, but it has sparked a more widespread debate.
Recently, I received a comment on one of my photographs that had been uploaded to a stock photography site, stating that it was nicely taken, but didn't look real due to the "Photoshopping". To say I was confused and irritated was putting it mildly, as I aim for reality in most of my photos and don't have the patience for lengthy processing. Also, the photo in question had, had a simple curves adjustment to increase the contrast and nothing else.


Recently, I received a comment on one of my photographs that had been uploaded to a stock photography site, stating that it was nicely taken, but didn't look real due to the "Photoshopping". To say I was confused and irritated was putting it mildly, as I aim for reality in most of my photos and don't have the patience for lengthy processing. Also, the photo in question had, had a simple curves adjustment to increase the contrast and nothing else.
After contacting the photographer who made the comment, I was able to ascertain, that he had looked at the EXIF data and assumed that it had been "Photoshopped", simply because I had edited it in Photoshop, so basically, even if I hadn't done any editing and had simply converted to a JPEG, he would have accused me of "Photoshopping". I think this is a sad reflection on how photography is now viewed and how people believe that anything is possible (including getting a good photo from a bad one) and that it doesn't portray what was seen. The reality is, that with few exceptions, you can't rescue a bad photo and probably most photographs are still a reflection of reality or at least the photographer's reflection of reality.
I find this attitude frustrating, but at the same time, I understand how it has happened. HDR photography has become widespread and in my opinion is overused, to the extent, that it is no longer original. In fact, there is a danger, that photographers are becoming clones, simply copying what has come before them, because it's the vogue, instead of searching for their own style. Don't get me wrong, I have used HDR, it is a useful tool when other techniques aren't possible, either because of the unavailability of graduated filters or because the terrain prevents their use. However, that is all it is, another technique to achieve the look you are aiming for and I usually use it to portray the reality, as closely as I saw it at the time.
That's not to say I haven't pushed the technique a bit further though. At times, I do experiment with post processing work, sometimes with the Orton Effect, sometimes with some infra-red and sometimes with HDR, but it's been a long itme since I did use HDR, really not since I acquired my reverse ND grad filter. Until then, it was the only tool I had to photograph sunsets effectively.
So in summary, there is a place for manipulated nature photographs, but only if used sparingly for an effect and I feel it should be declared where it isn't obvious. Certainly integrity should not be compromised when an image is used for a contest, otherwise the photographer and perhaps photography as a whole loses its credibility. The danger isn't so much in the act, but in the belief that anything is possible, the assumptions that have become widespread, the jumping on the bandwagon that has occured and the loss of creativity and ability to think for yourself as a result. To a large degree HDR has become popular because it gives the impression of a painting, which in some ways makes it fair game for the surreal and artistic licence. I feel that for the good of photography as an art form and for its continued evolution, editors, both of websites and of paper publications, must offer a more balanced viewpoint and selection of techniques. It's far too easy to feature HDR, just because of the impact, but if realism is shunned, then photography stagnates and doesn't develop.
Tuesday, 9 March 2010
Focus on Imaging 2010
I spent most of the day today at the Focus on Imaging exhibition at the NEC in Birmingham, UK. It's always interesting to see what's going on and to try out equipment first hand. I attended on the Sunday last year and you could barely move. It was busy when I arrived at lunchtime, but it was quite a bit quieter in the afternoon. This made it much easier to try things and to talk to people.
Last year, I didn't buy anything, but I spent some money this year on some pretty good deals, including a very good price on Sandisk Extreme compact flash cards, cheaper than I've seen anywhere online at the Camerworld stand. I also managed to find a refurbished macro ring flash, which I've been looking for, for a while, just waiting for the right price. I didn't succumb ot the temptation of a 5D Mk II though, although it was a close call until I bought the flash. To top off a successful day, I found some more options for a heavier duty tripod, that I can use with my 300mm f/2.8 lens. Up until now, I thought I'd have to get a Gitzo tripod, which aren't cheap, but it turns out, that Giotto also make mor ethan one that also cope with the weight. All in all, a successful and interesting day, with a critique at the Futurenet stand that went well.
Last year, I didn't buy anything, but I spent some money this year on some pretty good deals, including a very good price on Sandisk Extreme compact flash cards, cheaper than I've seen anywhere online at the Camerworld stand. I also managed to find a refurbished macro ring flash, which I've been looking for, for a while, just waiting for the right price. I didn't succumb ot the temptation of a 5D Mk II though, although it was a close call until I bought the flash. To top off a successful day, I found some more options for a heavier duty tripod, that I can use with my 300mm f/2.8 lens. Up until now, I thought I'd have to get a Gitzo tripod, which aren't cheap, but it turns out, that Giotto also make mor ethan one that also cope with the weight. All in all, a successful and interesting day, with a critique at the Futurenet stand that went well.
Monday, 16 November 2009
Event Photography and Carnival
When I went to Bridgwater Carnival a couple of weeks ago, little did I know that I would develop any sort of interest in event photography. I went mainly because my mum was coming up for the weekend and she had never been. It had taken me six years to decide to go and had it not been for my mum, I probably still wouldn't have gone. From a commercial point of view, it makes sense for me to go. The day is pretty much a non-starter where nature photography goes, as I can't get anywhere, with the roads being closed early and it doesn't take much effort to spend a few hours watching, so at least I can make some use of the day. However, since I looked at the results, I have been planning how I can improve next time. I even considered attending Glastonbury Carnival at the weekend and may have done, if not for the weather and logistical problems. While I'm happy with how most of the photos came out, I know I can improve and if I'm alone, I can get into position early, to get the best vantage point.
I'm not going to develop a full scale interest in event photography, but if the opportunity arises where it doesn't take up much of my time that could be better spent elsewhere, then I'll take it.
I'm not going to develop a full scale interest in event photography, but if the opportunity arises where it doesn't take up much of my time that could be better spent elsewhere, then I'll take it.
Sunday, 11 October 2009
Photography Basics
All art forms have their techniques, which should be learnt, but photography is probably unique in the amount of technical expertise that is required to achieve good results. Some of this technique involves the use of additional equipment, such as flash, strobes and filters, but before any of this equipment is used, the basics must first be mastered. Despite the obvious differences, film and digital photography have much in common and while the method of capture has changed, the terminology is equally applicable, even the ISO or ASA.
Film and Sensor Sensitivity
In the days of film, film was categorised by its American Standards Authority (ASA) sensitivity, which later was reclassified by the International Standards Organisation (ISO); it is this latter designation that has been passed on to the digital age. It was often referred to as the speed of the film, because the higher ISO ratings allowed higher shutter speeds to capture faster motion. The slowest film in general use was ISO 25, but the most commonly used film was ISO 100, which was ideal for everyday use in a variety of conditions. Digital cameras typically start at ISO 100 or ISO 200 and some can go as high as ISO 12,800, something that was unheard of in the days of film, although some slide film could be “pushed” quite high, as much as two stops above its rated ISO in some films. The amount of noise (assuming equal noise reduction algorithms) is dependent on sensor pixel density. The more pixels in a given area, the greater the resolution, but the greater the noise characteristics. The smaller sensor size of compact cameras, is therefore more likely to produce high levels of noise, due to higher pixel density, when compared to DSLR cameras with the same megapixel resolution.
Each time the ISO doubles, it lets in twice as much light and is the equivalent to a full stop by that definition. However, higher speed films tended to have larger grains, giving a grainier appearance in the resultant prints. Likewise, increasing the ISO of a digital sensor increases the noise that is present. The combination of increased noise and higher levels of noise reduction, either in camera or in post production can soften the detail in an image. The amount to which this matters, depends on the subject matter, the more detail there is in an image, the more important it is to preserve the detail. An example would be the fine textures in bird feathers, where detail is vital.
Aperture
The aperture is measured as a function of the focal length of the lens; it is inversely proportional, so is usually defined by f/x, where f is the focal length and x is a number which represents the aperture size. Because it is an inverse, increasing the f number actually decreases the size of the aperture, so f/2.8 is wider than f/5.6. Aperture has a very important effect on the image and when used correctly, can be the make or break of an image. It can also be used to good creative effect. Each full stop allows twice the amount of light in as the previous aperture. Many modern cameras can be adjusted by a third of a stop. The full stops most commonly encountered are f/2.8, f/5.6, f/8, f/11, f/16 and f/22. There are narrower and wider apertures, but they are only available on certain lenses.
 The size of the aperture has a big effect on the depth of field, this is the amount of the image that is in sharp focus, from the foreground to the background. A narrow depth of field results in a very small amount of the image being in sharp focus, while a deep depth of field results in most of the image being in sharp focus.
Wide apertures (such as f/2.8) are very good for portrait and wildlife photography. This is because they result in a narrow depth of field, which throws the background out of focus, helping to isolate the subject from an otherwise distracting background. Conversely, narrow apertures, such as f/16 result in a deep depth of field, which is an effect that is needed in landscape and architectural photography, so that as much of the image as possible is in focus.
Caution should be exercised though. Lenses are generally less sharp, especially at the corners, at their widest aperture, so often it is better to “stop down”. This is the practice of closing the aperture slightly. At the other end of the scale, with narrow apertures, you start to see the physical limitation called diffraction, this is where the light is bent as it passes through a narrow aperture and is a function of physics and not the lens. The resultant side effect of diffraction is again image softness. Some lenses start to exhibit the effects of diffraction earlier than others and natively sharp lenses are still able to produce sharp images at apertures affected on other lenses. Generally, diffraction sets in from around f/11, but it isn’t usually until beyond f/16, where the effects start to visibly affect sharpness. Sometimes, a scene is so expansive, that a very deep depth of field from a narrow aperture counteracts the diffraction to a great enough degree to make it worthwhile, but it is best not to go any narrower than f/16 unless absolutely necessary.
Just to complicate matters further, it isn’t just aperture size that affects the depth of field. Sensor size also has a role to play, the larger the sensor, the narrower the depth of field. Compact cameras have a much deeper depth of field, which makes it much harder to produce background blur, but does make keeping the whole landscape in focus easier. At the other end of the scale, full frame cameras (cameras with a sensor size equivalent to traditional 35mm film) have a much narrower depth of field, so much more care needs to be taken when preparing landscape shots. So-called cropped sensor DSLR cameras are somewhere in the middle, as they have a smaller sensor than full frame, but a much larger one than compacts. In addition, lens focal length is important, the longer the focal length of a lens, the narrower the apparent depth of field, as the increased focal length compresses the scene, making it easier to throw the background out of focus.
Shutterspeed
Shutterspeed controls the speed at which the shutter flips up and down, letting light onto the film or sensor. The longer the shutterspeed, the greater the amount of light that enters the sensor or film. Each full stop shutterspeed allows twice as much light as the next fastest. Like aperture, modern cameras are usually able to be adjusted by a third of a stop. Examples of full stops include 1/15 sec, 1/30 sec, 1/60 sec, 1/125 sec, 1/250 sec and so on. As can be seen, it is much easier to predict the effect on light, just by looking, than with the aperture. For example, 1/250 sec is twice the shutterspeed as 1/125 sec, so therefore will let in half the light. Faster shutter speeds allow the capture of fast motion, so are ideal for sports and wildlife. Slow shutterspeeds allow for motion blur, so are ideal for creating the silky effects of water in some landscapes.
Putting it all Together
The key to a good photograph though, is to get all the different aspects right and to do that, you need to understand how they interact. To get the right exposure, you need to get adequate light into the camera and it is how you control the different aspects, that determines the exposure. If you increase the shutterspeed by a full stop, you are halving the amount of light, therefore to compensate, you must either open the aperture by a full stop or increase the ISO. So for example, if you change the shutterspeed from 1/125 sec to 1/250 sec, you must open the aperture from f/5.6 to f/2.8 or increase the ISO from 100 to 200. Likewise, if you close the aperture from f/8 to f/11 to get more depth of field, you must decrease the shutterspeed, say from 1/30 sec to 1/15 sec or increase the ISO. It all sounds pretty complicated and it is to a degree, but the key is to practice; eventually it all comes together. Also, there are ways you can reduce the amount you have to think about each time, by using either aperture (Av) or shutter priority (Tv). By using these modes, you can set the camera, so that only one of either the aperture or shutterspeed respectively is varied by you. In aperture priority mode, you control the aperture and the camera adjusts the shutterspeed accordingly, if you need a faster shutterspeed, you can increase the ISO. The same principle applies with shutter priority. The more you practice, the easier it is to remember and eventually deliberately change things to get different effects, adding creativity. You’ll make mistakes to start with, probably alot of them, but it will come and remember, even the most seasoned of photographers make mistakes, they just don’t show them to people.
Film and Sensor Sensitivity
In the days of film, film was categorised by its American Standards Authority (ASA) sensitivity, which later was reclassified by the International Standards Organisation (ISO); it is this latter designation that has been passed on to the digital age. It was often referred to as the speed of the film, because the higher ISO ratings allowed higher shutter speeds to capture faster motion. The slowest film in general use was ISO 25, but the most commonly used film was ISO 100, which was ideal for everyday use in a variety of conditions. Digital cameras typically start at ISO 100 or ISO 200 and some can go as high as ISO 12,800, something that was unheard of in the days of film, although some slide film could be “pushed” quite high, as much as two stops above its rated ISO in some films. The amount of noise (assuming equal noise reduction algorithms) is dependent on sensor pixel density. The more pixels in a given area, the greater the resolution, but the greater the noise characteristics. The smaller sensor size of compact cameras, is therefore more likely to produce high levels of noise, due to higher pixel density, when compared to DSLR cameras with the same megapixel resolution.
Each time the ISO doubles, it lets in twice as much light and is the equivalent to a full stop by that definition. However, higher speed films tended to have larger grains, giving a grainier appearance in the resultant prints. Likewise, increasing the ISO of a digital sensor increases the noise that is present. The combination of increased noise and higher levels of noise reduction, either in camera or in post production can soften the detail in an image. The amount to which this matters, depends on the subject matter, the more detail there is in an image, the more important it is to preserve the detail. An example would be the fine textures in bird feathers, where detail is vital.
Aperture
The aperture is measured as a function of the focal length of the lens; it is inversely proportional, so is usually defined by f/x, where f is the focal length and x is a number which represents the aperture size. Because it is an inverse, increasing the f number actually decreases the size of the aperture, so f/2.8 is wider than f/5.6. Aperture has a very important effect on the image and when used correctly, can be the make or break of an image. It can also be used to good creative effect. Each full stop allows twice the amount of light in as the previous aperture. Many modern cameras can be adjusted by a third of a stop. The full stops most commonly encountered are f/2.8, f/5.6, f/8, f/11, f/16 and f/22. There are narrower and wider apertures, but they are only available on certain lenses.
The size of the aperture has a big effect on the depth of field, this is the amount of the image that is in sharp focus, from the foreground to the background. A narrow depth of field results in a very small amount of the image being in sharp focus, while a deep depth of field results in most of the image being in sharp focus.Wide apertures (such as f/2.8) are very good for portrait and wildlife photography. This is because they result in a narrow depth of field, which throws the background out of focus, helping to isolate the subject from an otherwise distracting background. Conversely, narrow apertures, such as f/16 result in a deep depth of field, which is an effect that is needed in landscape and architectural photography, so that as much of the image as possible is in focus.
Caution should be exercised though. Lenses are generally less sharp, especially at the corners, at their widest aperture, so often it is better to “stop down”. This is the practice of closing the aperture slightly. At the other end of the scale, with narrow apertures, you start to see the physical limitation called diffraction, this is where the light is bent as it passes through a narrow aperture and is a function of physics and not the lens. The resultant side effect of diffraction is again image softness. Some lenses start to exhibit the effects of diffraction earlier than others and natively sharp lenses are still able to produce sharp images at apertures affected on other lenses. Generally, diffraction sets in from around f/11, but it isn’t usually until beyond f/16, where the effects start to visibly affect sharpness. Sometimes, a scene is so expansive, that a very deep depth of field from a narrow aperture counteracts the diffraction to a great enough degree to make it worthwhile, but it is best not to go any narrower than f/16 unless absolutely necessary.
Just to complicate matters further, it isn’t just aperture size that affects the depth of field. Sensor size also has a role to play, the larger the sensor, the narrower the depth of field. Compact cameras have a much deeper depth of field, which makes it much harder to produce background blur, but does make keeping the whole landscape in focus easier. At the other end of the scale, full frame cameras (cameras with a sensor size equivalent to traditional 35mm film) have a much narrower depth of field, so much more care needs to be taken when preparing landscape shots. So-called cropped sensor DSLR cameras are somewhere in the middle, as they have a smaller sensor than full frame, but a much larger one than compacts. In addition, lens focal length is important, the longer the focal length of a lens, the narrower the apparent depth of field, as the increased focal length compresses the scene, making it easier to throw the background out of focus.
Shutterspeed
Shutterspeed controls the speed at which the shutter flips up and down, letting light onto the film or sensor. The longer the shutterspeed, the greater the amount of light that enters the sensor or film. Each full stop shutterspeed allows twice as much light as the next fastest. Like aperture, modern cameras are usually able to be adjusted by a third of a stop. Examples of full stops include 1/15 sec, 1/30 sec, 1/60 sec, 1/125 sec, 1/250 sec and so on. As can be seen, it is much easier to predict the effect on light, just by looking, than with the aperture. For example, 1/250 sec is twice the shutterspeed as 1/125 sec, so therefore will let in half the light. Faster shutter speeds allow the capture of fast motion, so are ideal for sports and wildlife. Slow shutterspeeds allow for motion blur, so are ideal for creating the silky effects of water in some landscapes.
Putting it all Together
The key to a good photograph though, is to get all the different aspects right and to do that, you need to understand how they interact. To get the right exposure, you need to get adequate light into the camera and it is how you control the different aspects, that determines the exposure. If you increase the shutterspeed by a full stop, you are halving the amount of light, therefore to compensate, you must either open the aperture by a full stop or increase the ISO. So for example, if you change the shutterspeed from 1/125 sec to 1/250 sec, you must open the aperture from f/5.6 to f/2.8 or increase the ISO from 100 to 200. Likewise, if you close the aperture from f/8 to f/11 to get more depth of field, you must decrease the shutterspeed, say from 1/30 sec to 1/15 sec or increase the ISO. It all sounds pretty complicated and it is to a degree, but the key is to practice; eventually it all comes together. Also, there are ways you can reduce the amount you have to think about each time, by using either aperture (Av) or shutter priority (Tv).
By using these modes, you can set the camera, so that only one of either the aperture or shutterspeed respectively is varied by you. In aperture priority mode, you control the aperture and the camera adjusts the shutterspeed accordingly, if you need a faster shutterspeed, you can increase the ISO. The same principle applies with shutter priority. The more you practice, the easier it is to remember and eventually deliberately change things to get different effects, adding creativity. You’ll make mistakes to start with, probably alot of them, but it will come and remember, even the most seasoned of photographers make mistakes, they just don’t show them to people.
Saturday, 26 September 2009
The Untapped Source
I've created a new gallery at The Untapped Source, a site that specialises in fine art prints. It offers an outlet to a different market. I will concentrate on my landscape work there initially.
Friday, 18 September 2009
Wildlife Photography
Wildlife is a popular subject for many photographers. Many will specialise in other subject matter to make money, but photograph wildlife for pleasure. However, it isn't straightforward. To be successful as a wildlife photographer takes more than being a good photographer, you also need to have good fieldcraft and know the animal. Many professional wildlife photographers will spend weeks or months on a project, trying to get close enough to get the shots they need. Some animals are used to people, so they are much easier to get close to them and get good compositions, while others take alot of patience. Even some insects are very difficult to get close to.
Equipment is also problematic, as the specialist lenses required are very expensive. While landscape photography requires a number of filters, the cost of the lenses in comparison is relatively inexpensive for good quality glass. While you may pay upwards of £1000 for a high quality prime lens, a high quality prime lens for wildlife work is upwards of £3500. Also, the difference in quality between a good wide-angle to standard zoom and a prime is minimal, so the primes are less attractive. However, with a few exceptions, there is quite a large difference in quality between telephoto zooms and primes.
I use the Canon 100-400mm L IS lens for most of my wildlife photography. While it isn't the highest quality, it is still good, plus it is light and relatively inexpensive. I do find that I'm always looking for more reach though. When the situation dictates, however, it is the ideal lens for tracking and stalking animals, because of it's relative lightness and flexibility as a zoom. I also use the Canon 100mm macro for my macro work, although I am considering a longer macro lens for some of the shy insects. Common to all macro lenses, the image quality is outstanding and despite not being an L grade lens, it has good build quality.
Using a telephoto lens takes alot of practice to get optimal technique. It is very easy to blame the lens for poor image quality, when it is simply a case of not applying good long lens technique. As with most photography, a tripod will give the best chance of a sharp image, but it isn't always practical. Image stabilisation is a boon, as it gives you a much greater chance of sharp images, particularly at slower shutterspeeds, but with the older lenses, you must remember to switch it off when mounted on a tripod. Beanbags and monopods are often more use than a tripod, as they don't need time to set up and are easier to carry unobtrusively. This is important when the animal you're stalking may only present a photographic opportunity for a split second. Having a good stalking technique though, will give you the best chance of being able to take a bit more time to get the composition right.
Stalking animals takes practice. They have a much better sense of smell than humans, so it is important to approach downwind of them where possible. Better still though, is to let the animal come to you. This is where fieldcraft and knowledge of the animal really comes in. You can either observe an animal and predict where it is going, so that you can get in place before it gets there or you can observe signs and stake out a likely spot. These are the sort of tactics that work for the Eurasian otter, particularly the coastal animals in Scotland. Even insects need to be approached carefully. It is important to be aware of where your shadow is, as the moment your shadow goes over the insect, it is likely to fly off. Instead, try to approach, so that your shadow is behind you. Failing that, try to make yourself as small as possible, so your shadow is shorter. It may be necessary to make the final approach by crawling. In all cases, you need to move slowly, so as not to seem a threat. Some insects have better vision in some areas than others, so learn where their blind spots are. While basic principles apply, each animal is different, which is why it is important to know as much as possible about behaviour.

Composition is just as important in wildlife photography as any other form. It is very easy to get the standard shots, like a side on deer or the top view of a butterfly, but try to think of different angles or look for specific behaviour. Also, don't necessarily go for the close up, sometimes it is much more interesting to photograph a subject, in context with it's environment. Think about depth of field, for closeups, you want to blur the background, so go for a wider aperture, conversely, a context shot may need the background in focus, requiring a narrower aperture. Also, make sure that the shutterspeed is fast enough to freeze the subject or wait until it freezes, unless you are deliberately looking for motion blur or are going to pan. This may mean that you need to increase the ISO setting. While you should always use the lowest ISO setting possible, you shouldn't be afraid to increase it when necessary. It is better to get some noise, than get a blurred shot because the shutterspeed was too low. Bear in mind also, that too much noise may be so distracting, that it renders the image useless for anything but personal pleasure, so learn when it isn't worth bothering.
Learning wildlife photography can be quite difficult, partly, because the opportunities for practice are less than landscapes and you don't always get a second chance. I have enjoyed learning the techniques though and look forward to perfecting and learning more.
Equipment is also problematic, as the specialist lenses required are very expensive. While landscape photography requires a number of filters, the cost of the lenses in comparison is relatively inexpensive for good quality glass. While you may pay upwards of £1000 for a high quality prime lens, a high quality prime lens for wildlife work is upwards of £3500. Also, the difference in quality between a good wide-angle to standard zoom and a prime is minimal, so the primes are less attractive. However, with a few exceptions, there is quite a large difference in quality between telephoto zooms and primes.
I use the Canon 100-400mm L IS lens for most of my wildlife photography. While it isn't the highest quality, it is still good, plus it is light and relatively inexpensive. I do find that I'm always looking for more reach though. When the situation dictates, however, it is the ideal lens for tracking and stalking animals, because of it's relative lightness and flexibility as a zoom. I also use the Canon 100mm macro for my macro work, although I am considering a longer macro lens for some of the shy insects. Common to all macro lenses, the image quality is outstanding and despite not being an L grade lens, it has good build quality.
Using a telephoto lens takes alot of practice to get optimal technique. It is very easy to blame the lens for poor image quality, when it is simply a case of not applying good long lens technique. As with most photography, a tripod will give the best chance of a sharp image, but it isn't always practical. Image stabilisation is a boon, as it gives you a much greater chance of sharp images, particularly at slower shutterspeeds, but with the older lenses, you must remember to switch it off when mounted on a tripod. Beanbags and monopods are often more use than a tripod, as they don't need time to set up and are easier to carry unobtrusively. This is important when the animal you're stalking may only present a photographic opportunity for a split second. Having a good stalking technique though, will give you the best chance of being able to take a bit more time to get the composition right.
Stalking animals takes practice. They have a much better sense of smell than humans, so it is important to approach downwind of them where possible. Better still though, is to let the animal come to you. This is where fieldcraft and knowledge of the animal really comes in. You can either observe an animal and predict where it is going, so that you can get in place before it gets there or you can observe signs and stake out a likely spot.
These are the sort of tactics that work for the Eurasian otter, particularly the coastal animals in Scotland. Even insects need to be approached carefully. It is important to be aware of where your shadow is, as the moment your shadow goes over the insect, it is likely to fly off. Instead, try to approach, so that your shadow is behind you. Failing that, try to make yourself as small as possible, so your shadow is shorter. It may be necessary to make the final approach by crawling. In all cases, you need to move slowly, so as not to seem a threat. Some insects have better vision in some areas than others, so learn where their blind spots are. While basic principles apply, each animal is different, which is why it is important to know as much as possible about behaviour.Composition is just as important in wildlife photography as any other form. It is very easy to get the standard shots, like a side on deer or the top view of a butterfly, but try to think of different angles or look for specific behaviour. Also, don't necessarily go for the close up, sometimes it is much more interesting to photograph a subject, in context with it's environment. Think about depth of field, for closeups, you want to blur the background, so go for a wider aperture, conversely, a context shot may need the background in focus, requiring a narrower aperture. Also, make sure that the shutterspeed is fast enough to freeze the subject or wait until it freezes, unless you are deliberately looking for motion blur or are going to pan. This may mean that you need to increase the ISO setting. While you should always use the lowest ISO setting possible, you shouldn't be afraid to increase it when necessary. It is better to get some noise, than get a blurred shot because the shutterspeed was too low. Bear in mind also, that too much noise may be so distracting, that it renders the image useless for anything but personal pleasure, so learn when it isn't worth bothering.
Learning wildlife photography can be quite difficult, partly, because the opportunities for practice are less than landscapes and you don't always get a second chance. I have enjoyed learning the techniques though and look forward to perfecting and learning more.
Tuesday, 15 September 2009
Photographic Passion
In my last blog entry, I talked about my thoughts and decisions surrounding my photographic future and career path. I talked of how I'd considered what subject matter I shoot and whether I could make money from it. My conclusion was to continue to shoot what I enjoy, instead of switching to something more commercial. But what is it that I enjoy?
When I was younger, before my long break from photography, I shot mainly railway scenes, trying to combine them with beautiful scenery when I could. I also photographed at many air displays, shooting both static exhibits and fast moving jets. At the time, I was using a Zenith 11, which created some challenges. To start with, the light meter wasn't through the lens and it tended towards underexposure, by as much as one and a half stops. That was surmountable though, I just had to compensate, compensating further when using a telconverter. More problematic though, was the maximum shutterspeed of 1/500th of a second, very slow for such fast moving objects as jets. I coped though, probably more so than now when I need to pan. Later, when I was too busy concentrating on a career in science to practice photography, I was limited to photographing historic architecture while on holiday.
 When I took up photography seriously again though a couple of years ago, switching to digital at the same time, it was landscapes that I concentrated on. I have spent many hours practicing and perfecting my technique on photographing landscapes in my local area and getting used to using various filters. I enjoy landscape photography and the challenges it provides, the chance to visit the local area and to go for walks. However, my real passion is for wildlife.
 From a very young age, I watched wildlife programs on TV. As with many children, African wildlife spurred the imagination, largely in part, because that was the biggest subject matter shown. It is only in more recent years that more local wildlife has been shown on TV. However, one British animal that did feature in my imagination was the Eurasian Otter, although at the time, I wasn't aware of other otter species. Being from Devon, in the UK, I was never far away from Tarka country, the area in North Devon where the story of Tarka the Otter was based. Throughout my childhood, the otter was seriously endangered and it was thought that it may soon become extinct. That is possibly why it caught my imagination, it had that air of mystery about it and it could be a constant dream to see one, but at the same time a dream that seemed unacheivable. Often dreams never match reality, so it would seem that my dream would never be sullied by reality. Now though, the otter has recovered significantly in Britain, so that dreams can become reality. I saw my first otter in Scotland, in March 2008, underneath the Kessock Bridge, just outside of Inverness and was hooked. I then spent several days over that spring and summer searching for otters on Shapwick Heath in Somerset, a place that is considered to be one of the best places to see them in England, largely because they don't stick to their usual nocturnal habits, but also because the population, while still being vulnerable, is much healthier than it once was. This year, they don't seem to be as numerous, but they are still visible there and in other areas of the Avalon Marshes.
Alongside my burgeoning interest in otters, was my interest in macro photography, in particular dragonflies. Wildlife photography generally is more difficult because of the fieldcraft involved and the element of luck, you can't expect animals to be present on tap, but macro photography allows you to photograph other subjects while waiting. Of course, they are also part of the story, without insects, other life wouldn't exist, fish and amphibians need them to survive, just as the otters need the fish.
 Having decided that I wanted to continue to photograph wildlife and having decided it wasn't as easy to teach myself, as I could with landscapes, I attended some photography workshops with Laurie Campbell, one of the prominent Scottish nature photographers. I had already attended a wildlife week at the Aigas field centre, nearly Beauly, Inverness-Shire and the photography workshops they organised seemed very good value. Laurie is an inspiration. The first workshop was awful weather, yet he demonstrated how it was possible to take photographs in even the worst weather and it forced me to try new things, even still life images of plants and motion blur shots of birds at a feeder. It literally broadened my horizons.
So with my passion for wildlife reaffirmed and a new found reason for my landscape work, it better equipped me for the next stage in my progression. And so the quest for more than just record shots was born. I am now looking to create more artistic work, starting with macros, where I can practice, but with ideas for larger plans and projects slowly forming. My recent shortlisting for the British Wildlife Photography Awards has shown that I have made some progress, but there is still more I need to do. It's been frustrating not being able to get out with my camera over the past few weeks, but hopefully I can soon get on with my planned projects.
When I was younger, before my long break from photography, I shot mainly railway scenes, trying to combine them with beautiful scenery when I could. I also photographed at many air displays, shooting both static exhibits and fast moving jets. At the time, I was using a Zenith 11, which created some challenges. To start with, the light meter wasn't through the lens and it tended towards underexposure, by as much as one and a half stops. That was surmountable though, I just had to compensate, compensating further when using a telconverter. More problematic though, was the maximum shutterspeed of 1/500th of a second, very slow for such fast moving objects as jets. I coped though, probably more so than now when I need to pan. Later, when I was too busy concentrating on a career in science to practice photography, I was limited to photographing historic architecture while on holiday.
When I took up photography seriously again though a couple of years ago, switching to digital at the same time, it was landscapes that I concentrated on. I have spent many hours practicing and perfecting my technique on photographing landscapes in my local area and getting used to using various filters. I enjoy landscape photography and the challenges it provides, the chance to visit the local area and to go for walks. However, my real passion is for wildlife.From a very young age, I watched wildlife programs on TV. As with many children, African wildlife spurred the imagination, largely in part, because that was the biggest subject matter shown. It is only in more recent years that more local wildlife has been shown on TV. However, one British animal that did feature in my imagination was the Eurasian Otter, although at the time, I wasn't aware of other otter species. Being from Devon, in the UK, I was never far away from Tarka country, the area in North Devon where the story of Tarka the Otter was based. Throughout my childhood, the otter was seriously endangered and it was thought that it may soon become extinct. That is possibly why it caught my imagination, it had that air of mystery about it and it could be a constant dream to see one, but at the same time a dream that seemed unacheivable. Often dreams never match reality, so it would seem that my dream would never be sullied by reality. Now though, the otter has recovered significantly in Britain, so that dreams can become reality. I saw my first otter in Scotland, in March 2008, underneath the Kessock Bridge, just outside of Inverness and was hooked. I then spent several days over that spring and summer searching for otters on Shapwick Heath in Somerset, a place that is considered to be one of the best places to see them in England, largely because they don't stick to their usual nocturnal habits, but also because the population, while still being vulnerable, is much healthier than it once was. This year, they don't seem to be as numerous, but they are still visible there and in other areas of the Avalon Marshes.Alongside my burgeoning interest in otters, was my interest in macro photography, in particular dragonflies. Wildlife photography generally is more difficult because of the fieldcraft involved and the element of luck, you can't expect animals to be present on tap, but macro photography allows you to photograph other subjects while waiting. Of course, they are also part of the story, without insects, other life wouldn't exist, fish and amphibians need them to survive, just as the otters need the fish.
Having decided that I wanted to continue to photograph wildlife and having decided it wasn't as easy to teach myself, as I could with landscapes, I attended some photography workshops with Laurie Campbell, one of the prominent Scottish nature photographers. I had already attended a wildlife week at the Aigas field centre, nearly Beauly, Inverness-Shire and the photography workshops they organised seemed very good value. Laurie is an inspiration. The first workshop was awful weather, yet he demonstrated how it was possible to take photographs in even the worst weather and it forced me to try new things, even still life images of plants and motion blur shots of birds at a feeder. It literally broadened my horizons.So with my passion for wildlife reaffirmed and a new found reason for my landscape work, it better equipped me for the next stage in my progression. And so the quest for more than just record shots was born. I am now looking to create more artistic work, starting with macros, where I can practice, but with ideas for larger plans and projects slowly forming. My recent shortlisting for the British Wildlife Photography Awards has shown that I have made some progress, but there is still more I need to do. It's been frustrating not being able to get out with my camera over the past few weeks, but hopefully I can soon get on with my planned projects.
Tuesday, 8 September 2009
Photography to Sell or for the Pleasure?
We've all dreamt of that job, where you can combine pleasure with earning a living - so we can give up that mundane existence at work and I'm no different. I've been trying to sell my photos now since October 2007, when I got my first digital camera, a Canon 400D and signed up to Shutterpoint. As pressures at work got worse and the stress levels increased, I began to think of ways I could earn a living, enough so that I would be able to tell the boss to stick it one day. I'd been through the process before, thinking of things I could do, could I make use of my audit and quality training? Could I start up a mobile computer repair service? Both had been discarded for different reasons. In this new round of musing though, I was considering photography. Specialising in a saturated market though, means that sales are few and far between.
That was when I did some soul searching. Should I continue to photograph what I like, such as landscapes and wildlife, or should I shoot more commercial subjects? I probably have the greatest aptitude for historical architecture, probably from all the practice on holidays, visiting historical sites across Europe. Over the past couple of years though, I've concentrated on improving my landscape photography, to the point, where I think I can hold my own with alot of people and produce images with impact. It doesn't always work out of course, but I can tell when I'm in with a chance. My real passion though is wildlife, although I don't get as much opportunity to practice and I've produced a number of macro images in particular that I'm proud of. It gave me a real buzz to be shortlisted for the 2009 British Wildlife Photography Awards, even though I didn't get any further. Despite that though, it doesn't earn much money and that brings me back to the decision process I went through almost a year ago now. Advertising is where the real money is (although the recent recession has cut many advertising budgets) and anything showing people or human activity, especially children sells well. However, as a landscape photographer, it is almost the antipathy of what I do. To go from cursing under my breath to actively pursuing people would be quite a change for me, not to mention a whole new learning process. Another option would be electronics, food and other similar still life work, but I find such photography soulless. Many excel at it, but it has never really interested me. It was then that I decided, that the day I started photographing purely to make money, instead of photographing what I enjoy, would probably be the same day I put the camera back in its box, never to see the light of day again.
Having been through that thought process, if anyone asked me what they should photograph, my response would be "whatever you enjoy photographing". If you photograph something you enjoy, then there is a greater incentive to learn and improve, ultimately making you a better photographer and in a roundabout way, there is a greater chance of success, albeit, not necessarily in monetary terms. As artists, we are all looking for critical acclaim and while money is nice, I think that is what is important, to be lauded by your peers.
Thursday, 27 August 2009
Landscape Photography Part 2 - Technique
In part 1 I discusssed the artistry behind landscape photography. Before I start on the technique, I'll say a little about micro landscapes. Micro landscapes are pretty much as the name would suggest, landscapes on a small scale. This could be a detail shot of a small area or perhaps even a macro image showing the minute details in a very small scene, maybe showing the habitat of an insect or other small animal.


Some assumption is made below regarding knowledge of photography basics, such as depth of field, aperture size and the relationship between the two. There are a number of articles available that describe the basics of photography if needed. I may cover some basics in a future blog entry.
Whether a micro landscape or a more traditional one, the basic technical issues are similar. Some form of support is essential. Normally this would be a tripod, but if the conditions dictate, a beanbag could be used or perhaps rarely, a monopod. Beanbags are particularly handy for low level perspectives or if the conditions are very windy. Some tripods are also able to be dropped down very low to the ground. Generally speaking, shutterspeed is a secondary consideration to aperture size and ISO setting. Unless conditions are windy and a faster shutterspeed is required to freeze foliage, then the slowest film speed or ISO setting should be selected, which for most digital cameras is ISO 100 (some may require the use of a "low" setting to achieve ISO 100 and some may offer ISO 50). Aperture is dependent on the scene itself and how much depth there is. For most landscapes, an aperture of f/8 to f/16 should be selected, occasionally narrowing the aperture to f/22. Most scenes contain quite alot of depth to them, so to get adequate depth of field, f/16 is needed, in order that the whole scene is in sharp focus. Sometimes a scene may not require as much depth of field, for example, photographing a waterfall or cascade from a distance, when there is very little background. In such cases, it is better to aim for a slightly wider aperture such as f/8 or f/11, as most lenses are sharper at the slightly wider apertures (i.e. mid-range). It is also preferable not to go narrower than f/16, as you start to get problems with diffraction, which is a physical barrier and one that will soften the image. At f/22 it is easily noticeable, but there may be occasions, where the need for more depth of field outweighs the effects of diffraction. Beyond f/22 though, the image is little more than a soup without much detail and should be avoided. A natively sharp lens will be sharper at f/22, even though the effects are just as great, so high quality lenses will still allow a higher quality image. One last thing to consider is the camera you are using or more to the point, the size of the capture device. Film cameras and full frame digital cameras will require a smaller aperture than crop cameras (smaller sized sensors) to get the same depth of field.
The key to taking a competent landscape photograph is to understand how the different settings on your camera interact with one another and what effect they have on the resultant image. The first point of call is your user manual, it is surprising how much useful information you will find, they don't just contain instructions for use, but also chapters on making the most from your camera. Being able to take a great landscape photograph however, is a different story. It is something that takes lots of practice, luck, swearing and visiting an area several times until the light is just how you want it. It is important to know your camera inside out, so that you can then concentrate on the creative side to try out different ideas.
Sunday, 23 August 2009
Landscape Photography Part 1 - The Artistry
Landscape photography is perhaps one of the most varied forms of photography, ranging from urban landscapes, through to dramatic mountain scenes and even micro-landscapes; the small scale landscapes of small subjects. The basic rules and principles remain though, whatever the subject.
The key to a good landscape is maximum sharpness across the whole scene and to have a strong subject or lines. To get maximum sharpness, a tripod is essential. Even when you're able to use high shutterspeeds, there is some softening of the image if a tripod isn't used. Sharpness can also be increased by using mirror lockup and in fact for longer shutterspeeds, it is imperative. Weather conditions can also affect the quality of what may otherwise be a perfectly good landscape image. Wind is often the bane of a landscape photographer, especially without a solid, sturdy tripod. In very windy conditions, a beanbag may be useful, as the lower the camera is to the ground, the less it is affected by the wind. Foliage is also blown about by wind, so unless you're looking for more of an abstract image, the wind may dictate when you photograph your chosen subject landscape.
Lighting is the next key to a good photograph and may turn an average image into a great one. Bland, grey skies rarely make for an interesting landscape, but change those for deep, moody clouds and you can have a very dramatic scene. This image typifies the sort of image you can get on the Scottish Western Isles and proves, you don't need bright colours.

There are also other ways that you can make use of the light, for example, sun shining through the clouds onto the main subject or simply the angle of lighting, particularly in the golden hours after sunrise and before sunset.

Shooting during the golden hours gives you the best chance for a landscape with real impact, because it is when the light is at its softest, allowing for less harsh contrasts and the ability to use the lengthening shadows to add depth to the scene. This also increases the mid-tone contrast, which is the area in the histogram that gives the image the punch it needs to stand out.
Without a strong compositional element though, many landscapes fall flat, simply because there is nothing within the scene to attract viewers. The best landscapes are often simple when you look at them closely, even when they contain many fine details. Most of the best landscapes can be diluted down to an interesting foreground, which draws the viewer in, then there may be leading lines, either diagonals or s-shaped curves, pulling the viewer towards the main subject, which is likely to be on one of the thirds intersections. Sometimes, the main subject is the landscape as a whole, but there is usually a strong supporting subject on a thirds line in these cases and the leading line acts as a guide, taking the viewer on a tour around the image. Both of the above examples use the shore as a leading line from the corners to the distance, literally going through most of the scene.
In Part 2 I will talk of some of the more technical aspects of landscape photography and visit micro-landscapes.
The key to a good landscape is maximum sharpness across the whole scene and to have a strong subject or lines. To get maximum sharpness, a tripod is essential. Even when you're able to use high shutterspeeds, there is some softening of the image if a tripod isn't used. Sharpness can also be increased by using mirror lockup and in fact for longer shutterspeeds, it is imperative. Weather conditions can also affect the quality of what may otherwise be a perfectly good landscape image. Wind is often the bane of a landscape photographer, especially without a solid, sturdy tripod. In very windy conditions, a beanbag may be useful, as the lower the camera is to the ground, the less it is affected by the wind. Foliage is also blown about by wind, so unless you're looking for more of an abstract image, the wind may dictate when you photograph your chosen subject landscape.
Lighting is the next key to a good photograph and may turn an average image into a great one. Bland, grey skies rarely make for an interesting landscape, but change those for deep, moody clouds and you can have a very dramatic scene. This image typifies the sort of image you can get on the Scottish Western Isles and proves, you don't need bright colours.
There are also other ways that you can make use of the light, for example, sun shining through the clouds onto the main subject or simply the angle of lighting, particularly in the golden hours after sunrise and before sunset.
Shooting during the golden hours gives you the best chance for a landscape with real impact, because it is when the light is at its softest, allowing for less harsh contrasts and the ability to use the lengthening shadows to add depth to the scene. This also increases the mid-tone contrast, which is the area in the histogram that gives the image the punch it needs to stand out.
Without a strong compositional element though, many landscapes fall flat, simply because there is nothing within the scene to attract viewers. The best landscapes are often simple when you look at them closely, even when they contain many fine details. Most of the best landscapes can be diluted down to an interesting foreground, which draws the viewer in, then there may be leading lines, either diagonals or s-shaped curves, pulling the viewer towards the main subject, which is likely to be on one of the thirds intersections. Sometimes, the main subject is the landscape as a whole, but there is usually a strong supporting subject on a thirds line in these cases and the leading line acts as a guide, taking the viewer on a tour around the image. Both of the above examples use the shore as a leading line from the corners to the distance, literally going through most of the scene.
In Part 2 I will talk of some of the more technical aspects of landscape photography and visit micro-landscapes.
Thursday, 13 August 2009
Macro Photography
Macro photography is arguably one of the more difficult forms of photography to master, it is certainly more technical than some others and it is important to understand the effects of depth of field. In many ways, depth of field is one of the biggest hurdles a macro photographer has to overcome, either by using a narrow aperture or to embrace the narrow depth of field in such a way that it becomes a form of creativity. At wider apertures, the depth of field can be measured in millimetres. Almost without exception, manual focus should be used because of the narrow depth of field, even at f/16.
 True macro is considered to be 1:1 or life size (or larger). Many zoom lenses are marketed as macro lenses, but typically, they are around 1/3 or 1/4 life size and they certainly don't have the sharpness associated with true macro prime lenses. The choice of lens is dependent on what sort of subjects interest you as a photographer and what backgrounds you want to include. At their closest focusing distance, all macro lenses will blur the background to an equal degree for any given aperture, although the focal length will determine how close it focuses. For example, a 100mm lens will have a closer focusing distance than a 180mm lens, but if both are 1:1, they will both blur the background to the same degree. However, the 180mm lens will include less of the background, making a pleasing background easier to achieve, as it will potentially have less distracting background elements (such as bright objects). For best results a tripod (or monopod/bean bag) should always be used, although sometimes it simply isn't possible.
Shorter macro lenses are good all-round lenses (50-60mm range), useful for a range of macro (and non-macro) subjects, although trying to get close enough to insects would be a challenge, so they are best used for still life or where there is limited space. The medium sized macro lenses (90-105mm) become more useful for insect macro photographs, so are perhaps even more useful as all-rounders, although in confined spaces, it may be difficult to fit larger subjects in the frame (i.e. non-macro images). If insects are likely to be your main interest, then the longer (150-200mm) lenses are going to be the most useful, although they do come at a price and they tend to be less sharp than the medium focal length lenses, also some sort of support is essential. Luckily, because you're further away from the subject, it is much easer to set a tripod up, without disturbing the subject and sending it flying away. Another advantage with the longer macro lenses, they are compatible with teleconverters (extenders in Canon land) and not just extension tubes. Teleconverters and extension tubes both increase the magnification (and converters also increase focal length of course), but the 2x converters can reduce image quality quite a bit and extension tubes prevent infinity focus. Most (but not all) of the shorter macro lenses are unable to make use of teleconverters, although they can make use of extension tubes. Short of getting specialist macro lenses (like Canon's MPE-65 5x macro lens or microscope attachment), this is the greatest magnification you can achieve.
There isn't really a bad macro lens in terms of image quality and they all have a high reputation interms of image quality. In the two most poular mounts (Canon and Nikon), Nikkor, Canon, Sigma and Tamron all make excellent lenses, with Sigma offering the greatest range of focal lengths. Sigma and Tamron also make lenses in the other popular mounts, along with other options from the camera manufacturers. It may also be possible to get adaptors to use other lenses, such as Zeiss, Leica and M42 mounts.

True macro is considered to be 1:1 or life size (or larger). Many zoom lenses are marketed as macro lenses, but typically, they are around 1/3 or 1/4 life size and they certainly don't have the sharpness associated with true macro prime lenses. The choice of lens is dependent on what sort of subjects interest you as a photographer and what backgrounds you want to include. At their closest focusing distance, all macro lenses will blur the background to an equal degree for any given aperture, although the focal length will determine how close it focuses. For example, a 100mm lens will have a closer focusing distance than a 180mm lens, but if both are 1:1, they will both blur the background to the same degree. However, the 180mm lens will include less of the background, making a pleasing background easier to achieve, as it will potentially have less distracting background elements (such as bright objects). For best results a tripod (or monopod/bean bag) should always be used, although sometimes it simply isn't possible.Shorter macro lenses are good all-round lenses (50-60mm range), useful for a range of macro (and non-macro) subjects, although trying to get close enough to insects would be a challenge, so they are best used for still life or where there is limited space. The medium sized macro lenses (90-105mm) become more useful for insect macro photographs, so are perhaps even more useful as all-rounders, although in confined spaces, it may be difficult to fit larger subjects in the frame (i.e. non-macro images). If insects are likely to be your main interest, then the longer (150-200mm) lenses are going to be the most useful, although they do come at a price and they tend to be less sharp than the medium focal length lenses, also some sort of support is essential. Luckily, because you're further away from the subject, it is much easer to set a tripod up, without disturbing the subject and sending it flying away. Another advantage with the longer macro lenses, they are compatible with teleconverters (extenders in Canon land) and not just extension tubes. Teleconverters and extension tubes both increase the magnification (and converters also increase focal length of course), but the 2x converters can reduce image quality quite a bit and extension tubes prevent infinity focus. Most (but not all) of the shorter macro lenses are unable to make use of teleconverters, although they can make use of extension tubes. Short of getting specialist macro lenses (like Canon's MPE-65 5x macro lens or microscope attachment), this is the greatest magnification you can achieve.
There isn't really a bad macro lens in terms of image quality and they all have a high reputation interms of image quality. In the two most poular mounts (Canon and Nikon), Nikkor, Canon, Sigma and Tamron all make excellent lenses, with Sigma offering the greatest range of focal lengths. Sigma and Tamron also make lenses in the other popular mounts, along with other options from the camera manufacturers. It may also be possible to get adaptors to use other lenses, such as Zeiss, Leica and M42 mounts.
Tuesday, 28 July 2009
Having spent a week on the Isle of Skye, one of the Scottish Western Isles, I have now created a new gallery, within the Scotland collection. Although the weather wasn't ideal, it did allow some moody landscapes and a couple of sunset images. I also updated the Birds gallery.
Isle of Skye - Images by Richard Winn
Isle of Skye - Images by Richard Winn
Thursday, 23 April 2009
Swans in Mating Ritual
New photographs added to the Birds gallery, showing a pair of mute swans during their mating ritual.
Birds - Images by Richard Winn
Birds - Images by Richard Winn
Monday, 13 April 2009
New Uploads to Glorious Devon Gallery
New images from Dartmoor and the Exe Estuary have been uploaded to the Glorious Devon gallery of Avalon Light Photoart.
Glorious Devon - Images by Richard Winn
Subscribe to:
Posts (Atom)


